If you’ve ever lost a sale to Amazon, the reason probably isn’t price. It’s certainty. Amazon shows ‘Get it tomorrow‘ before the customer even adds something to their cart. Your WooCommerce store shows nothing and uncertainty kills conversions.
The good news: adding estimated delivery dates to WooCommerce is straightforward, and you don’t need to write a single line of code to do it.
Why WooCommerce Doesn’t Show Delivery Dates by Default
WooCommerce handles payments, products, and orders well – but it was never built to calculate or display delivery timelines. Out of the box, customers see a shipping method and a price. They have no idea when to expect their package.
This creates a trust gap. Shoppers fill that gap with doubt, and doubt leads to abandoned carts. Studies consistently show that unexpected shipping information at checkout is one of the top three reasons customers don’t complete a purchase.
What You Actually Need to Show Delivery Dates
To display accurate delivery estimates, your store needs to account for three things:
- Processing time — how long it takes to prepare and dispatch an order after it’s placed
- Shipping transit time — how many days the carrier takes to deliver once the order has shipped
- Non-delivery days — weekends, public holidays, and days your warehouse doesn’t operate
Most solutions only account for transit time. That’s why delivery dates are often wrong — they ignore the gap between ‘order placed’ and ‘order shipped’.
The Easiest Way to Add Delivery Dates in WooCommerce
QuickShipD is a WooCommerce plugin built specifically for this. You configure your minimum and maximum delivery days, set an order cutoff time, tell it which days you don’t ship, and it automatically calculates and displays accurate delivery windows across your store — on product pages, shop pages, the cart, and checkout.
The setup takes about five minutes. You go to the Delivery tab, enter your minimum and maximum delivery days, set your daily cutoff time (the point after which same-day dispatch is no longer possible), toggle off weekends if you don’t ship on those days, and save. QuickShipD handles the rest calculating dates in real time and displaying them wherever your customers need to see them.
Step 1: Install QuickShipD
- Go to your WordPress dashboard → Plugins → Add New
- Search for QuickShipD
- Click Install Now, then Activate
That’s it. The plugin is now ready.
Step 2: Set Your Delivery Schedule
Go to:
WooCommerce → QuickShipD → Delivery tab
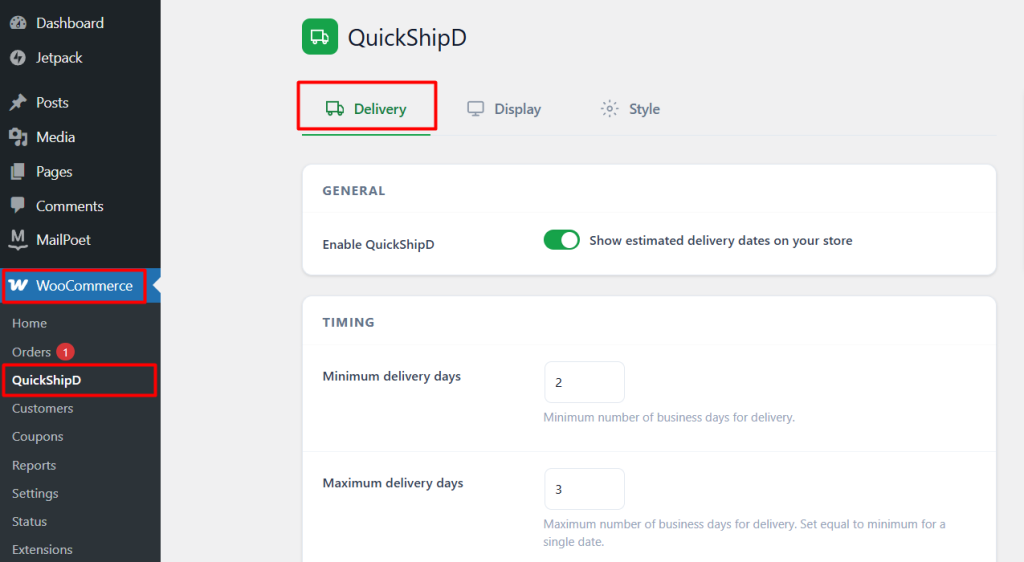
Here’s what to configure:
Minimum and Maximum Delivery Days
Set how long delivery takes.
Example:
- Min: 2 days
- Max: 3 days
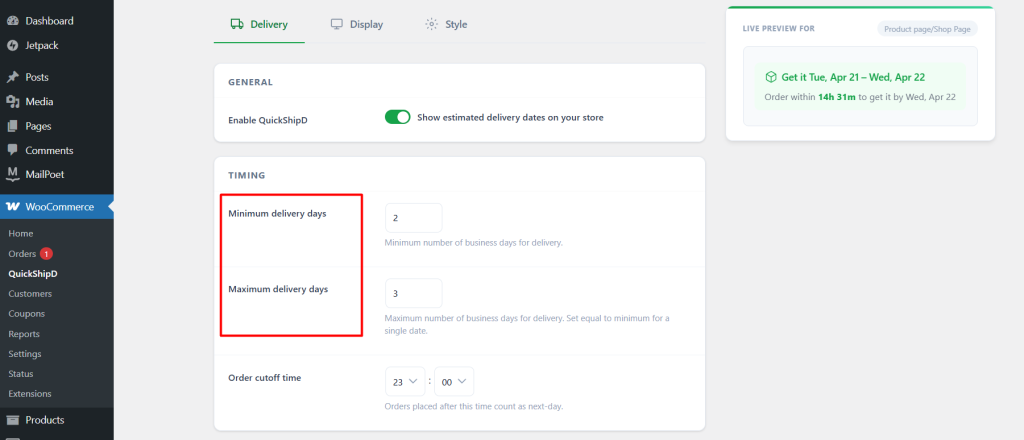
This will show:
“Get it Tue, Apr 22 – Wed, Apr 23”
This range gives you a realistic buffer instead of promising an exact date.
Order Cutoff Time
Set the time after which orders are processed the next day.
Example:
- Cutoff: 19:00 (7 PM)
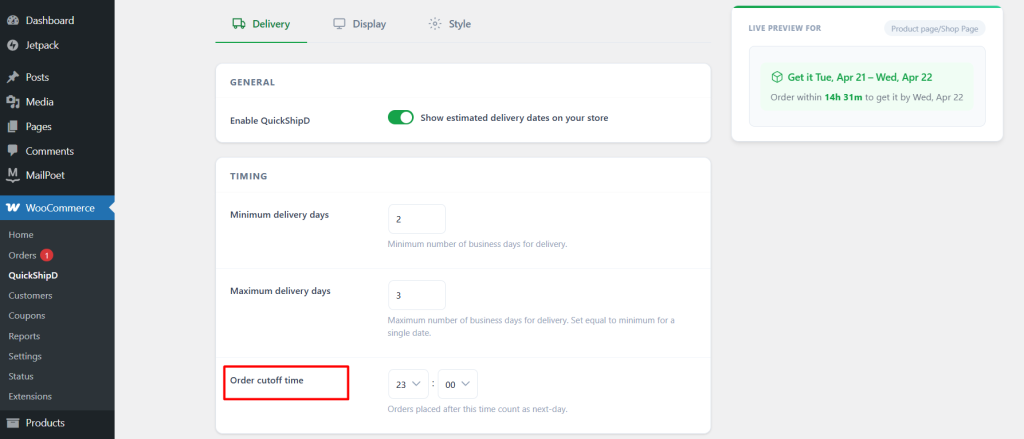
This ensures your delivery estimates stay accurate and your countdown timer reflects real operations.
Non-Delivery Days and Holidays
- Disable days you don’t ship (like weekends)
- Add holidays using recurring format (e.g. XXXX-12-25)
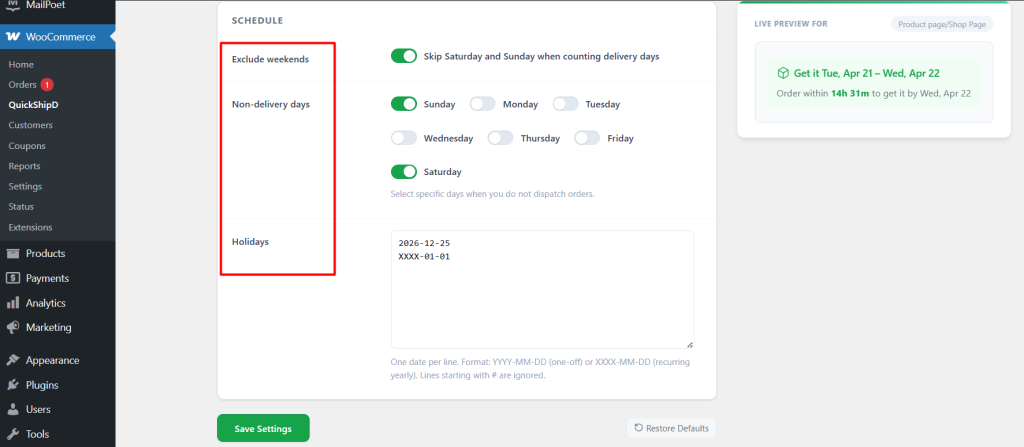
The plugin will automatically skip these days when calculating delivery dates.
At this point, your store knows your actual shipping schedule.
Step 3: Choose Where Delivery Dates Appear
Go to the Display tab
Enable delivery dates on:
- Product pages → shown before Add to Cart
- Cart page → visible per item
- Checkout page → reinforces at final step
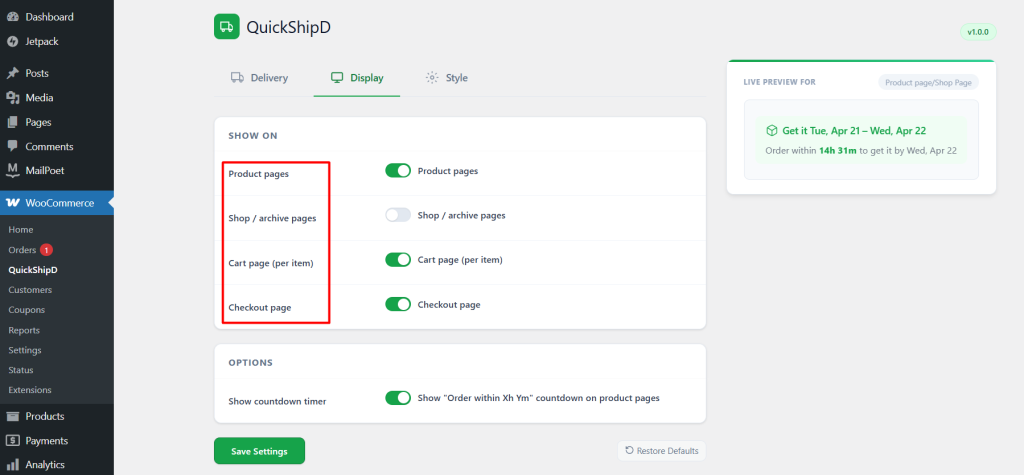
Also enable:
- Countdown timer → shows “Order within Xh Ym”
✅ Result: Delivery dates are now visible across your store.
Customers can clearly see when their order will arrive before they buy.
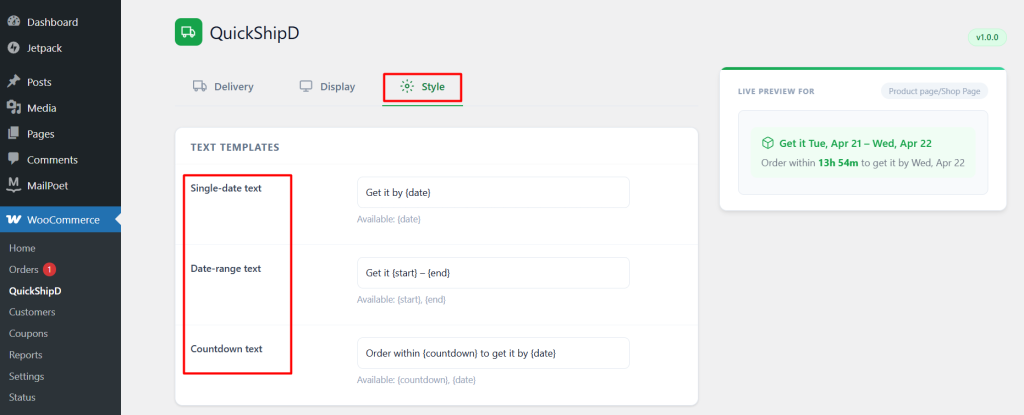
Step 4: Match It to Your Store’s Style
Go to the Style tab
Customize how delivery dates look:
Text Template
Change wording to match your brand:
- “Get it by {date}”
- “Arrives between {start} and {end}”
Colors
Adjust:
- Primary text color
- Secondary text color
- Background
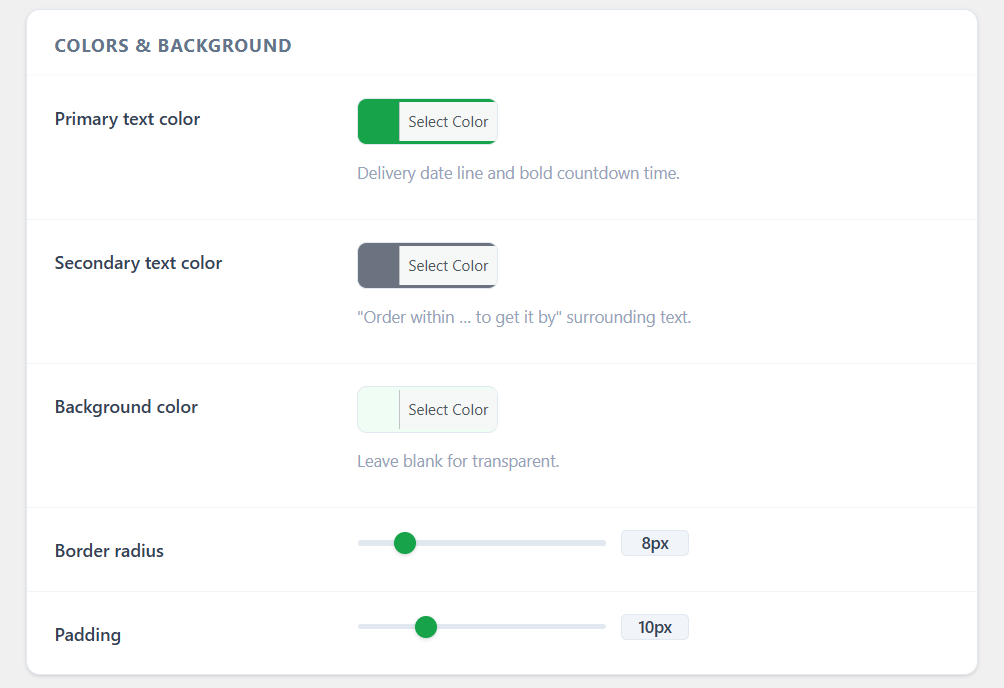
Make it blend naturally with your theme.
Date Format
Choose how dates display:
- “Wed, Apr 22”
- “22/04/2025”
- or your preferred format
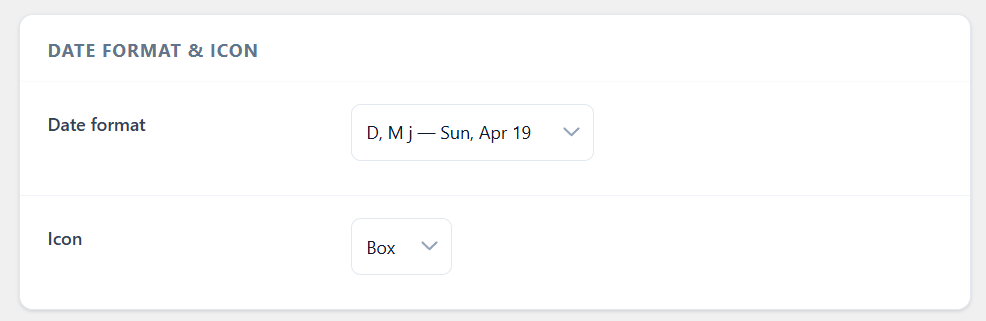
The live preview updates instantly, so you see exactly what customers will see.
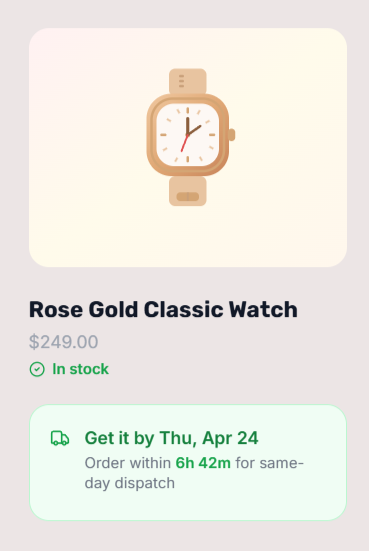
What Your Customers See
Once everything is set up, your store will display:
- Clear delivery dates
- Real-time countdown timers
- Accurate estimates based on your schedule

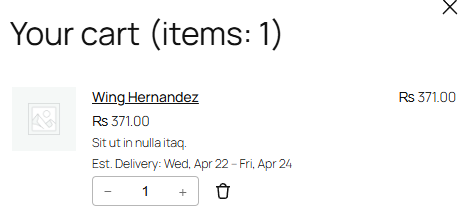
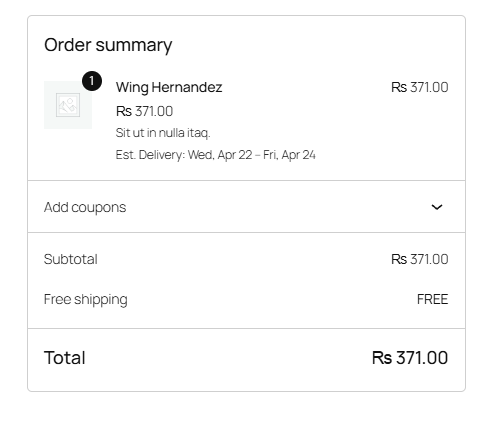
Instead of guessing, customers now know exactly when their order will arrive.
Final Thoughts
Adding delivery dates to WooCommerce is one of the simplest ways to improve conversions.
It removes uncertainty, builds trust, and helps customers make faster decisions.
And with a plugin like QuickShipD, you can set it up in just a few minutes.
Install QuickShipD, set your delivery schedule, and start showing customers exactly when their orders will arrive.
A small change, but a big impact on sales.
If you’re evaluating more than one tool, see our tested comparison of the best WooCommerce delivery date plugins and delivery integration providers for a full feature breakdown.