
Switching delivery date plugins isn’t something you do lightly — you’ve already got settings configured, and the last thing you want is a gap where your product pages show no estimate at all, or worse, two conflicting ones at once. A clean migration just takes a bit of sequencing.
Here’s a straightforward process for moving from another WooCommerce delivery date plugin to QuickShipD without a gap in coverage.
Step 1: Document Your Current Settings Before Touching Anything
Before deactivating your current plugin, write down exactly what it’s configured to do: minimum and maximum delivery days, cutoff time, which days you exclude, and any per-product overrides currently in place. This becomes your checklist for setting up QuickShipD accurately, rather than guessing at your own settings from memory.

| 🚧 IMPORTANT Don’t skip this step even if you’re confident you remember your settings. Per-product overrides especially are easy to forget once you have more than a handful of exceptions across your catalog. |
Step 2: Install and Configure QuickShipD Before Deactivating the Old Plugin
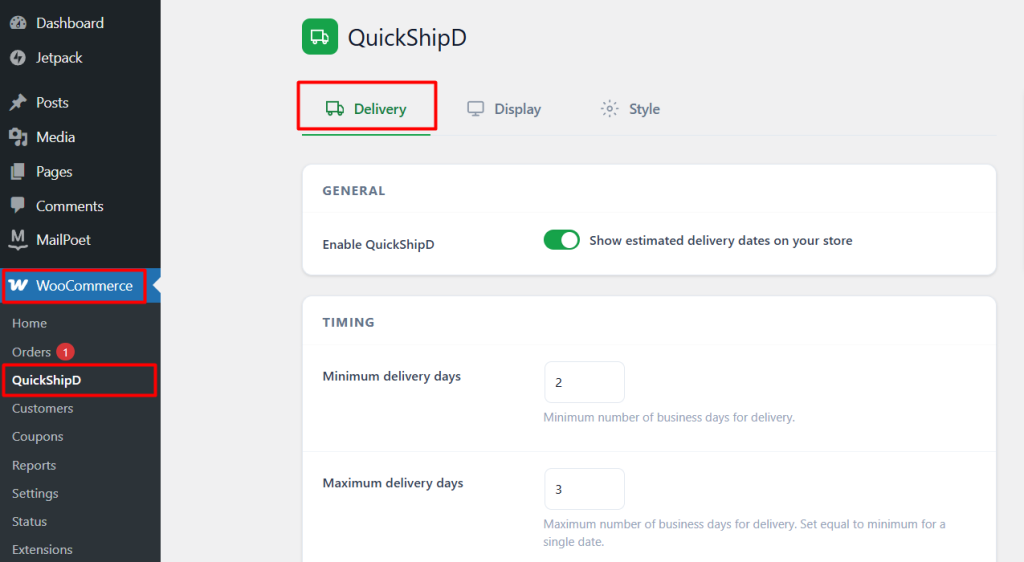
Install QuickShipD and fully configure the Delivery and Display tabs using the settings you documented, but leave your old plugin active for now. Having both installed briefly is fine — just don’t enable display for both at the same time, or you risk showing two estimates on the same page.
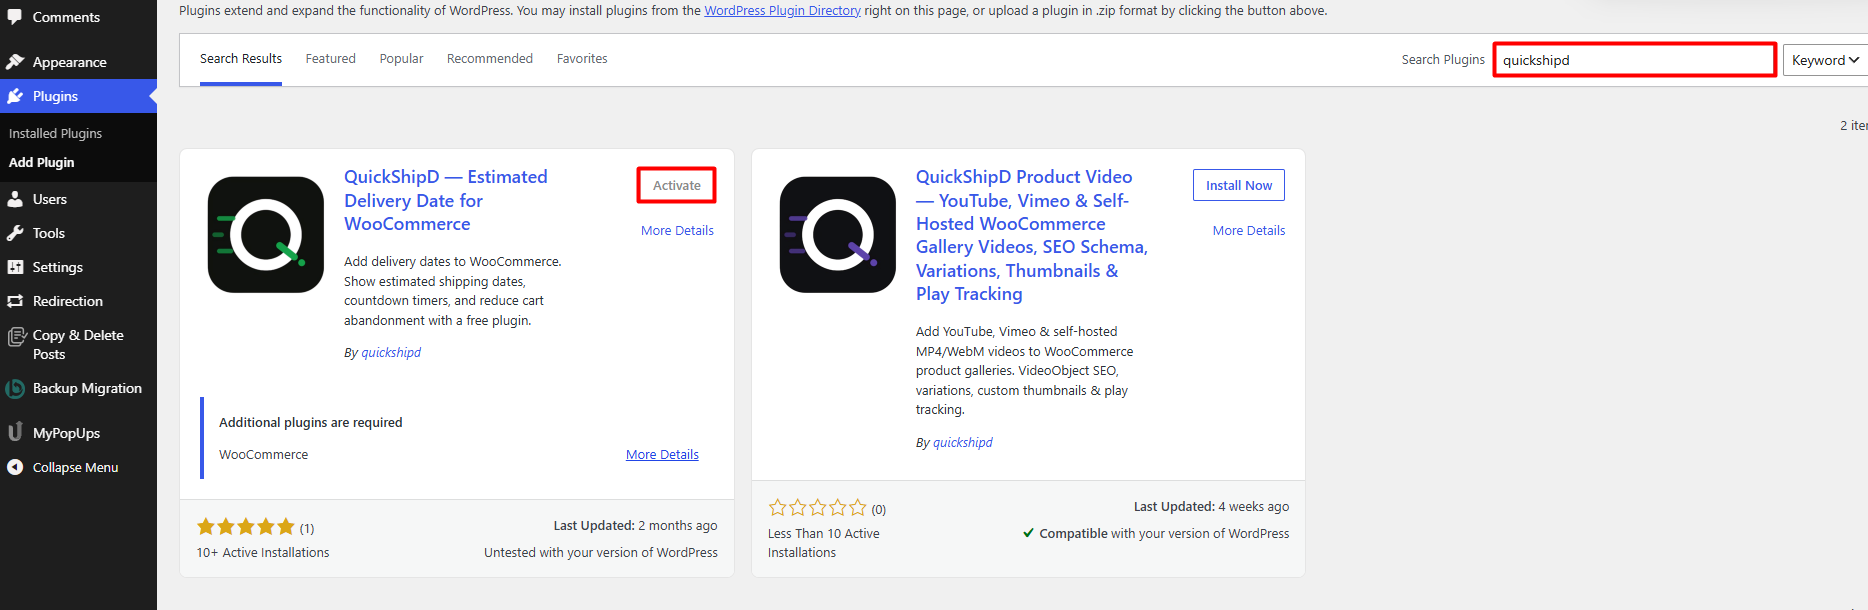
Step 3: Switch Over on a Staging Site First
If you have a staging copy of your site, deactivate the old plugin and enable QuickShipD’s display there first. Check every page you’d previously had an estimate on — product, shop, cart, checkout — to confirm QuickShipD is showing the same or better information before repeating the switch on your live site.
| 💡 PRO TIP If you don’t have a staging site, do the switch during low-traffic hours and check your live product pages immediately after, rather than assuming the migration went smoothly without verifying. |
Step 4: Deactivate the Old Plugin Cleanly
Once QuickShipD is confirmed working correctly, deactivate and remove the old plugin entirely rather than leaving it installed but inactive. An old, unused plugin left on your site is unnecessary clutter and a potential source of confusion later.
A Clean Switch Takes Sequencing, Not Complexity
Migrating between delivery date plugins is straightforward as long as you document first, configure before switching, and verify before removing the old tool. Skipping the documentation step is the most common way this goes wrong.
Once configured, QuickShipD picks up the same job with its own Delivery, Display, and Style tabs ready to go. If you’re also mid-migration or redesign on the rest of your site, see how to carry your delivery settings through a site migration or redesign without losing your configuration.
Not sure which tool to migrate to? Our comparison of the best WooCommerce delivery date plugins and delivery integration providers covers free-plan feature gaps across the major options.
Related Reading
- Does a Delivery Date Plugin Work With Your WooCommerce Theme?
- QuickShipD vs Order Delivery Date for WooCommerce: Which Is Better?
- QuickShipD vs PH Estimated Delivery Date for WooCommerce: Which Is Better?
- QuickShipD vs YITH WooCommerce Delivery Date: Which Is Better?
- What Happens to Your Delivery Settings During a Site Migration or Redesign