Unlike Amazon, WooCommerce doesn’t show delivery dates out of the box. Amazon date feature feels familiar to a lot of shoppers and entices them to place an order.
This guide shows you how to add them in product page, cart, and checkout, in under 2 minutes, for free.
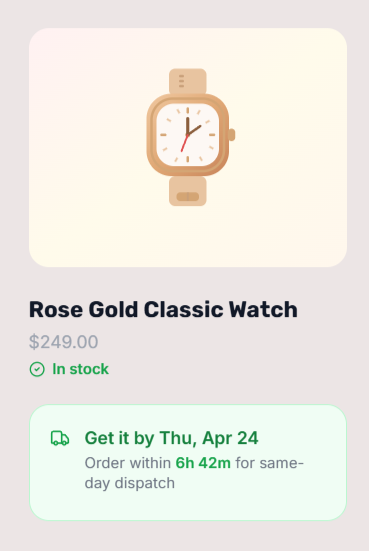
The end result looks like this:

What you’ll have after this
- A specific delivery date on every product page, automatically calculated
- A live countdown: “Order within 4h 12m” tied to your real cutoff time
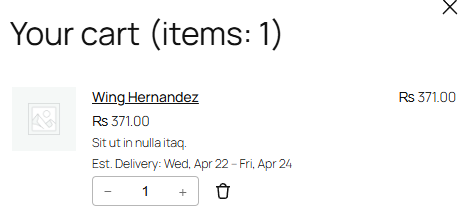
- The estimate carried through to cart and checkout
- Weekend and holiday skipping handled automatically
Steps to Add Amazon-Style Delivery Dates to WooCommerce
Now, lets use one of the best shipping dates plugin for adding the delivery dates: QuickShipD.
Step 1: Install QuickShipD
- Go to your WordPress dashboard → Plugins → Add New
- Search for QuickShipD
- Click Install Now, then Activate
Step 2: Set your delivery schedule
Go to WooCommerce → QuickShipD → Delivery tab.
Minimum and maximum delivery days: Set how many business days your orders take to arrive. For a 2–3 day window, set min 2 and max 3. This shows “Get it Tue, Apr 22 – Wed, Apr 23” instead of a single date, giving you a realistic buffer.
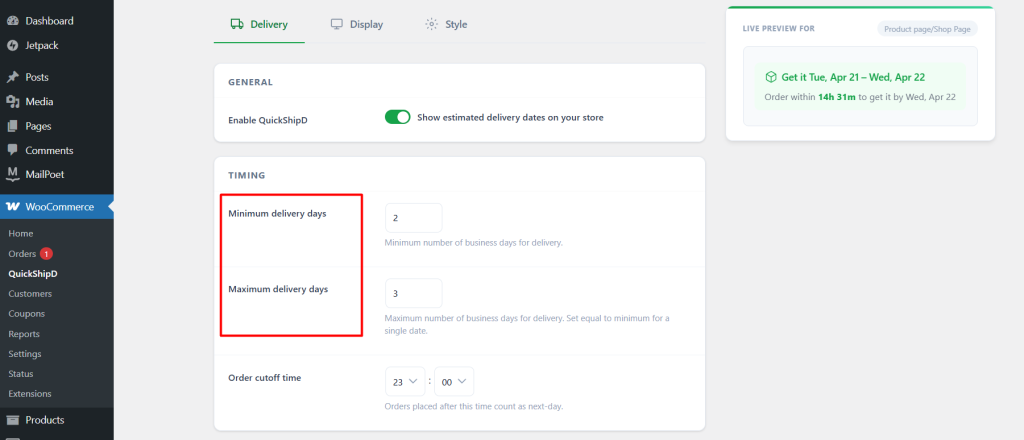
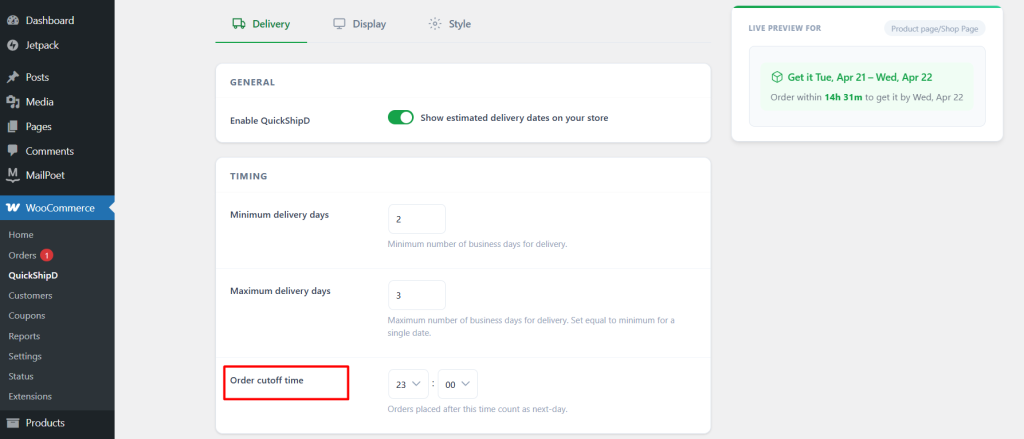
Order cutoff time: Set the time after which orders count as next-day. If you stop processing at 7:00 PM, set the cutoff to 19:00. This is what makes the countdown timer honest. It ticks down to your actual cutoff, not an arbitrary deadline.
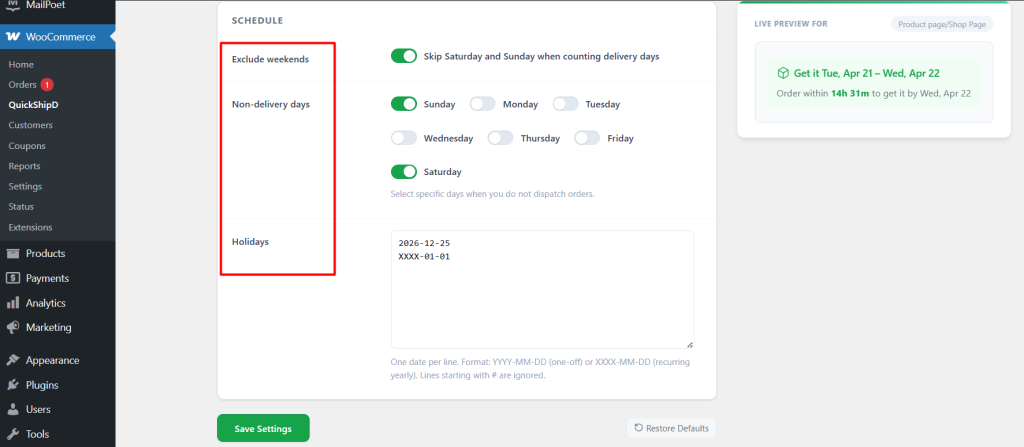
Non-delivery days and holidays: Toggle off the days you don’t dispatch — weekends are excluded by default. For holidays, add them once using the recurring format (XXXX-MM-DD) and QuickShipD skips them every year automatically.
Your store now knows when you actually ship. Delivery dates will be accurate to your real schedule.
Step 3: Choose where delivery dates appear
Go to the Display tab. Toggle on the pages that matter to your funnel:
- Product pages — shows the date before Add to Cart. This is where the buying decision happens.
- Cart page — keeps the commitment visible per line item.
- Checkout page — reinforces the date at the final payment step.
- Countdown timer — shows “Order within Xh Ym” on product pages. Recommended.
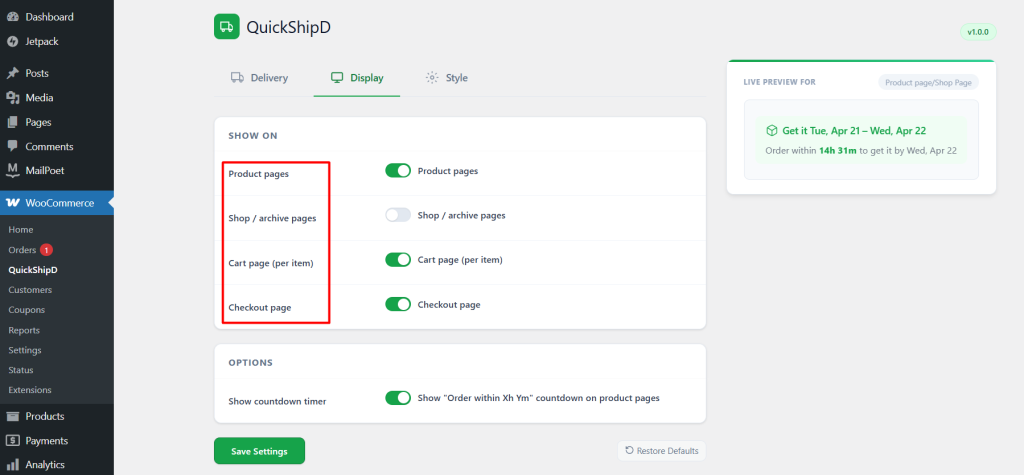
Result: Delivery dates are now live on your store. Customers see them immediately.
Step 4: Match it to your store’s style
Go to the Style tab. You don’t need to touch code.
- Text template: change the wording to fit your brand. “Arrives between {start} and {end}”, “Get it by {date}” — use any format you want.
- Colors: set the date text color, secondary text color, and background to match your theme.
- Date format: choose how dates display — “Wed, Apr 22” or “22/04/2025” or others.
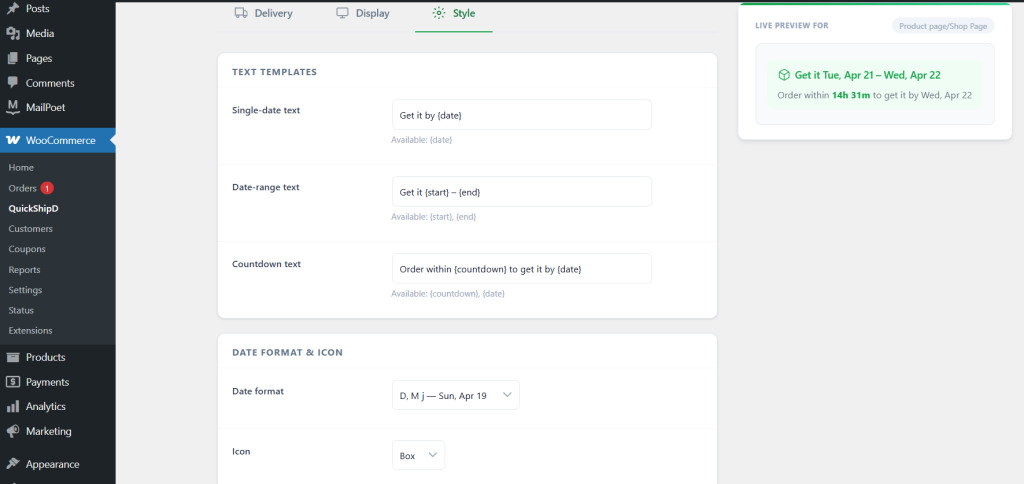
The live preview on the right updates as you type. You see exactly what customers will see before saving.
Optional: override dates per product
For products that ship on a different timeline — handmade items, pre-orders, furniture — you can set a different min/max directly on the product edit screen. No shortcodes or custom fields needed.
Every product shows the right estimate automatically.
The full result

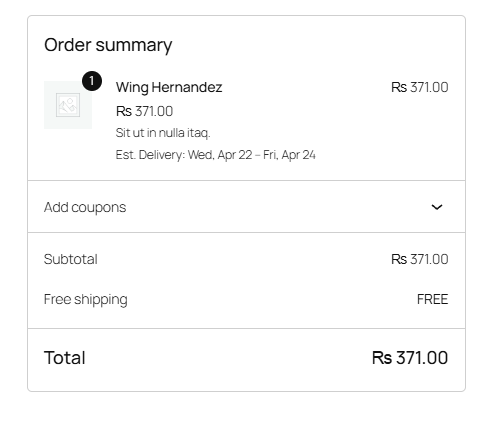
The same estimate follows the customer from product page to payment. No drop-off, no unanswered questions, no reason to hesitate.